Showing posts with label plasticard. Show all posts

Tuesday, 7 February 2017

Building an Ikaruga Fighter


It's certainly been a while since I last posted anything but I've finally found the time to so something about it. Real life can be such a PITA sometimes. Anyway, here's how I built my Ikaruga fighter


Wednesday, 23 November 2016

Building an Arrowhead

I'm still not sure where I got the idea from, it might have been an off hand comment on a forum somewhere. However from the point it entered my head, I just knew I had to make a G-1A look as similar to a R-9A Arrowhead as possible.


Sunday, 21 June 2015

Building a Wayfarer-class Medium Transport

Steam sale! That's my excuse for not updating for a while. That and the wonderful game Darkest Dungeon I bought during the sale. Anyway, I'm going to have to post several things the coming days to catch up with everything I've done.

Wayfarer-class Medium Transport
First on the chopping block is my latest scratchbuild, a Star Wars ship called the Wayfarer-class Medium Transport. Like all my previous Star Wars scratchbuilds this one is intended to be used in Fantasy Flight Games' X-wing game, though it could probably serve as a decent showpiece model as well.

Now the Wikia page claims the ship is 82 meters long which puts it in Epic territory, but the commissioner was adamant that that wasn't the case. He claimed that the length was based on an RPG deckplan and I can certainly see his point. Besides, it wouldn't be the first time the Star Wars Wikia has been wrong. If anyone still complains I will point them to the nearest space wizard, I mean Jedi. Anyway, it was instead estimated that the ship should be around 40 meters long which means almost 15cm in 1/270 scale. Still a rather big beast all things considered.


The Wayfarer has certainly been an interesting and challenging build. Not only is information and pictures of it really scarce (The picture at the start of this post is the only artist rendition I can find, the rest are deckplans) but it's also an asymmetrical ship. When I began the build I wasn't quite sure how to tackle this problem but in the end I decided to start on the container/hangar seeing as it would be the easiest part.


With the container built, I had to start consider the actual spaceship. The main hull would consist of the living quarters and bridge, an engine assembly and a big honking tube connecting everything. The tube was perhaps the most critical part of the entire build and I spent considerable time measuring and pondering before I dared make any cuts. It's actually a PVC tube normally used to electrical installations and it measures 25mm in diameter. It's probably a bit too large but the only other diameter available to me would have been too small instead. Gotta use what I can find.


With the main structural elements built and connected to each other I could finally start adding some less important bits and add some much needed strength to the pieces already glued to the tube. Round shapes are always difficult to work with and making a tube the spine of a ship certainly didn't make it any easier.


Up until this stage I wasn't sure if I should make the container detachable or not. In the end I decided that, while possible to magnetise the model, it just wouldn't look terribly good so I glued the ship to the container permanently. I wasn't quite sure at first how to build the 'claws' that can be seen holding the container close to the ship in the source picture, but in the end I think I managed a decent solution.


The final major part to be added was the bridge. As I said earlier, round shapes are difficult to work with at the best of times and the bridge doesn't have much in the form of straight edges so I had been dreading this part.

The main pieces are two pieces of solid plasticard, the smaller one being 2mm thick while the other one is two 2mm pieces glued together. I drew rough shapes and started cutting, sanding and grinding down the pieces until I was satisfied. Dremel type rotary tools are invaluable for this kind of work. While the two pieces aren't quite as symmetrical as I would have liked, it's unlikely that I will be able make them much better than this.


Now I could finally start adding details. Since I have no clue how the ship looks from underneath, my model doesn't really add much compared to the top. I tried to give the model the appearance of a ship that has been a bit modifed, but not too heavily. That type of look I leave to the Millenium Falcon.

Thursday, 4 June 2015

Building an E-wing Mk 2

Building the mark two version of the E-wing was simple and yet quite complex at the same time. I knew from the start that I couldn't mess around too much, because let's face it, there's not much model to go around. Any mistake would likely be very costly.

To minimise the amount of conversion work needed, I decided to keep as much of the original model as possible. This meant that most of the model's details would be preserved and make it look more authentic. In fact this was one of few complaints I had about MajorTom11's conversion. While he did a great job on his E-wing, I could never quite get over how some of the cuts he made ruined some of the details.


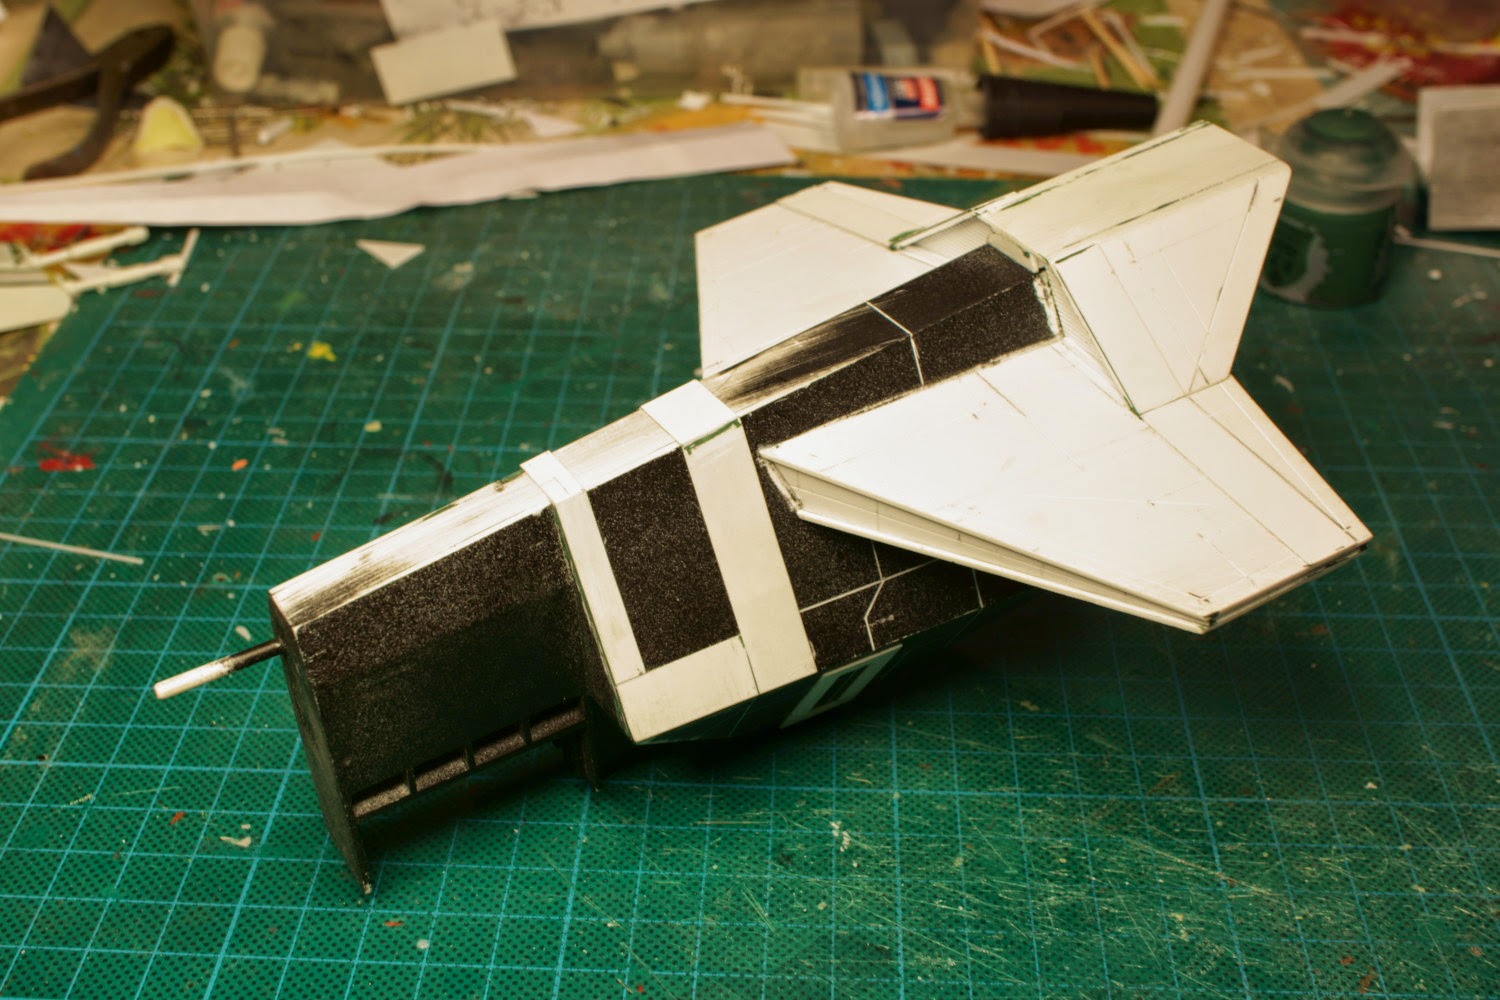
I carefully planned a series of cuts that would remove the wings as close to the fuselage as possible(blue lines). When that had been achieved I planned to remove the angled wingtips (green lines). Finally I wanted to chop off some unnecessary dead weight from the wings in order to make them look sleeker and more fitting of a high-tech space fighter (yellow lines).


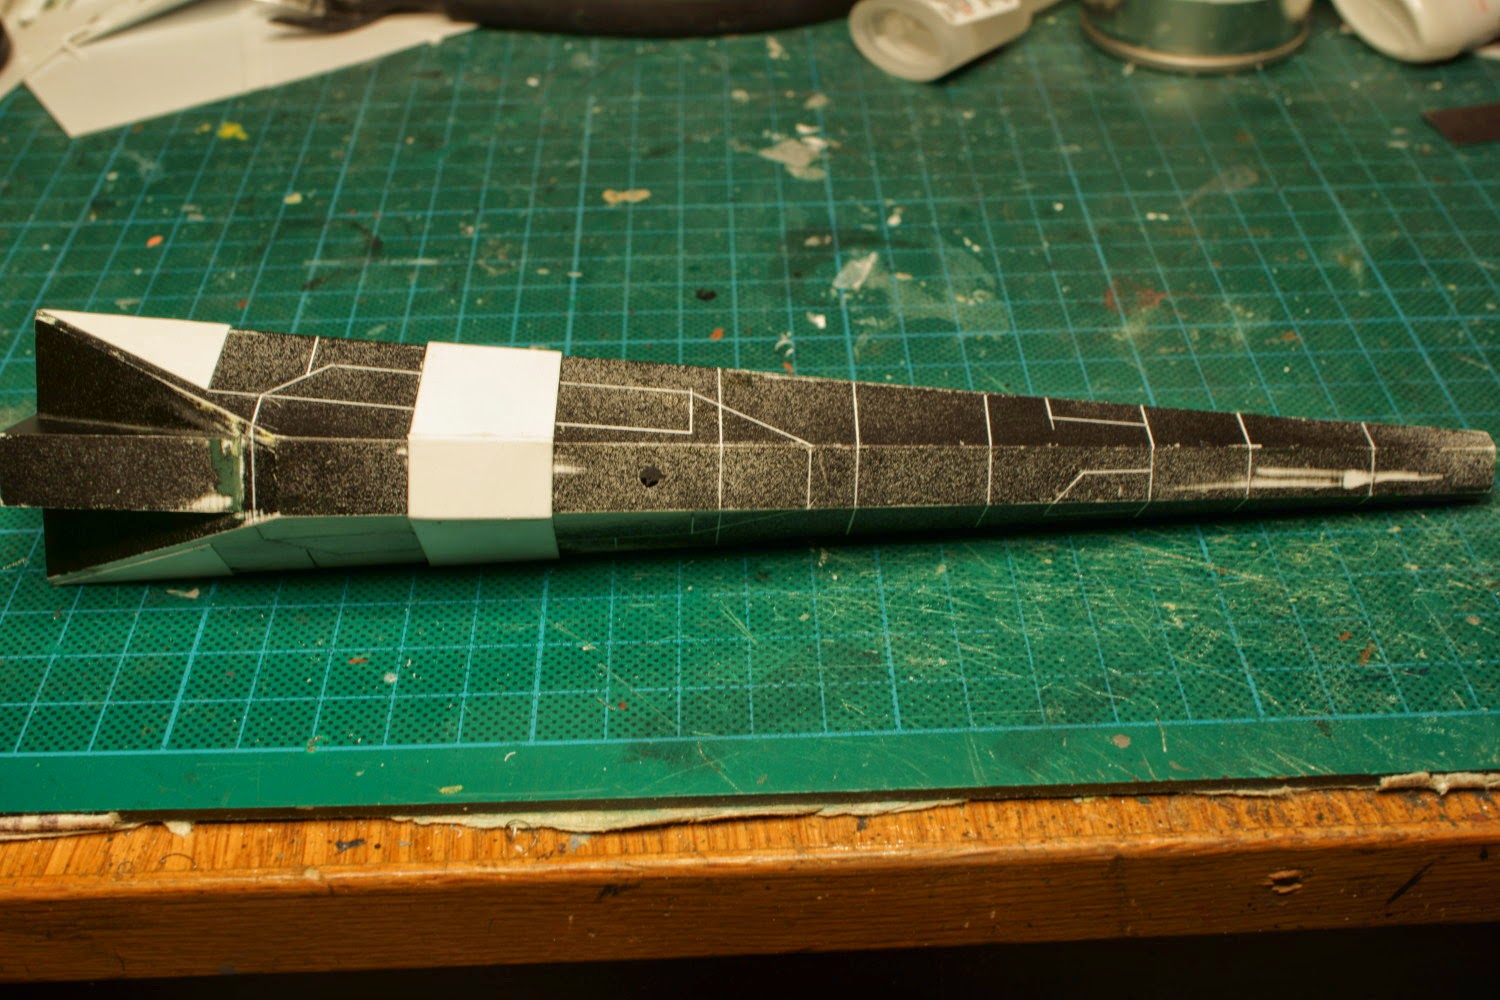
The top gun would also have to be removed (green lines) and the mounting point in particular would be ditched. The blue rectangle represent an area where I wanted to add an additional engine/ram scoop to each side of the fuselage and the yellow lines show how I planned to lengthen the nose quite considerably. In fact, the nose job was perhaps the most important part of this build as I've never quite like the model's somewhat phallic looking nosecone.


With the planning done, first on the agenda was removing the glued on pieces and the wings. Just about every cut on this model was made using a razor saw. Whatever you do, don't use a knife. A knife will damage the model more and will not cut as straight.


With the engines loose, I could now easily do further conversions on them. I sawed off the engine intake and made the rest of the engine about 2mm shorter (the area between the yellow lines). I then flipped around the intake, drilled a new hole in it and glued it back in place. To finish the conversion I added a short piece of 1mm piano wire in the middle of the intake though that is unfortunately not visible on the photo.


The removal of the 'dead weight' on the wings went as planned and didn't really prove terribly difficult. I did however discover that the laser cannons had to be moved closer to engines and also a bit further back. Not a huge problem however, seeing as the wingtips would also be removed and therefore make it much easier to reach the cannons.

When all the cuts had been made and I was satisfied with the modifications I simply glued all the pieces back where I wanted them. To remount the wingtips I first glued a small piece of 0.5mm plasticard rod in between the wing and the tip.


The nosejob began by trimming down nose quite considerably. To provide extra stability I drilled a hole in the tip and glued a short piece of 1mm piano wire in place. Around this I wrapped a blob of milliput which I poked and prodded lightly until I had achieved the aproximate shape I was looking for.

When the milliput had cured I could do some fine tuning. Excess milliput was removed and the shape was finalized. I also added a thin strip of plasticard on top of the nose to give further stability and give a smoother appearance. Some liquid green stuff to fill in the flaws and I was ready to do some panel lining.

At this stage I also added the extra engines/ramscoops. I had to remove quite a bit of detail on the sides of the fuselage in order to make the scoops fit well, but it was well worth the effort. Oh and for anyone wondering why the ship is upside down in some pictures, well it was easier to get a good photo from that angle.


With most of the ship finished, it was mostly just a matter of gluing the parts together. The final additions were some connections going from the fuselage to the wings and adding a new mount to the top gun while moving it to the back of the hull.

I have to say that I'm still not sold on the top gun. It's just a damnably stupid place to put a cannon. If I ever build another Mark 2 E-wing I will probably leave it off entirely. All in all though, I'm quite pleased with this one as it makes the E-wing a much sexier ship.


Thursday, 29 January 2015

Building a Storm Commando Escort Carrier part 2

Almost forgot to post this. As always I must ask myself where the time goes. Anyway here is the second part of how I built the Storm Commando Escort Carrier.


The three engines are quite frankly just several tubes inside of each other. The biggest tubes are actually not plasticard, but rather plastic tubing that is normally used in protecting electric wires in houses.


With the engines finished it was time to start doing some panel lines, and as you can see from the above set of pictures there were a lot of panel lines to be added! As usual, I sprayed the ship with some black paint so I could easier spot any flaws but as should be obvious above, it helps when doing pane lines as well. I also started adding some details


Next, I could finally start adding all the sub assemblies to the ship. Due to all the 'interesting' angles, I had to spend considerable time making sure that every part fit together as intended.


With all that done, only details and the small point defence turrets were left. Unfortunately I forgot to take a picture of the finished turrets but I suppose you get the general idea. All the turrets can be turned and aimed and a total of 15 magnets keep this ship together.

Despite the fact that I built the ship I still have a hard time wrapping my head around it. It's just so damned impressive! May it never face defeat and take part in many glorious victories!