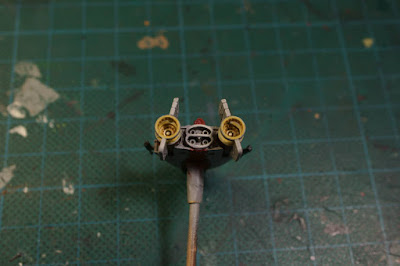
Anyway, simple ideas are not always as simple as one might first expect. For my recently repainted A-wings, all I really wanted was something quick and decidedly lacking in complexity, so I decided to repaint the normal paint scheme, just to a higher standard. Of course, it wasn't quite as simple as I had first thought.
Before painting, I always remove mould lines and look for flaws and imperfections. This time it really paid off as I discovered that the thruster vanes between the engines on the red A-wing were quite deformed. It's not terribly visible on the above picture but the thrusters are decidedly shorter on the red A-wing as I had to cut them down.
Both ships were primed with Vallejo's grey primer and base coated with a 1:8 mix of VMA White and VGA Stonewall Grey. The red A-wing was detailed with VMC German Grey for the guns and VGC Cold Grey for the darker panels, while the main red colour is VGC Scarlett Red.
The blue on the prototype A-wing was painted with a 1:2 mix of VGC Imperial Blue and VGC Magic Blue. I painted the engine exhaust with VGC Beasty Brown while the yellow bands on the sides of the engines were painted with a 1:2 mix AP Matt White and VGC Plague Brown.
Both ships were sprayed with a layer of gloss varnish. They were later washed with thinned AP Dark Tone Ink. After that I sealed the models with a layer of matte varnish.
Since both ships were highlighted quite differently (with the exception of the white fuselage) I'm writing the steps for each ships separately.
Fuselage
- 2:1 mix of Stonewall Grey and Matte White
- 2:5 mix of the previous step
- Pure Matte White
- 1:1 mix of Scarlett Red and VGC Bloody Red
- Pure Bloody Red
- 1:1 mix of Bloody Red and VGC Dwarf Skin
- 2:1 mix of German Grey and Cold Grey
- 1:2 mix of the previous step
- 1:1 mix of Cold Grey and Stonewall Grey
- 2:1 mix of Cold Grey and Stonewall Grey
- 1:2 mix of the previous step
- Pure Stonewall Grey
Fuselage
- 2:1 mix of Stonewall Grey and Matte White
- 2:5 mix of the previous step
- Pure Matte White
- Pure Magic Blue
- 2:1 mix of Magic Blue and Stonewall Grey
- 1:2 mix of the previous step
- 2:3 mix of Plague Brown and Matt White
- 1:2 mix of the previous step
- 1:3 mix of the first step
- 1:1 mix of Beasty Brown and VGC Khaki
- Pure Khaki
I tried a yellow engine glow this time, despite knowing that yellow is the colour of the devil. At least for painters it is. To get the base of the yellow colour I used a 1:4:3 mix of Plague Brown, AP Demon Yellow, and Matt White. This had to be applied in several thin layers to get good coverage.
For the shade I lightly washed the engines, concentrating on the recesses, with a 1:4:1:6 mix of Plague Brown, Demon Yellow, Matt White and AP Soft Tone ink, plus some water.
When the shading stage was finished I reapplied the first mix and gradually added more and more white towards the middle of the engines. The first mix was also used to create a slight OSL effect around the engines.
To make the ships look slightly weathered, I added streaks of thinned down Dark Tone ink with some black dry pigments added.
The cockpit of the red A-wing was painted using German Grey with a little Scarlett Red added. The reflection was built up using Scarlett Red that I gradually added small amounts of Bloody Red to. The blue A-wing was painted in the same manner as the red one, only using Imperial Blue instead of Scarlett Red and Magic Blue instead of Bloody Red.


No comments:
Post a Comment