

The nose of the ship was a problem throughout the entire build. Lack of pictures and references are always a problem, but in this case the nose was almost always obscured by those damnable prongs. I know that what I've built isn't quite accurate but it looks good none the less.


I also tried out normal Milliput as a filler and it works quite well. Mostly because I think it is easier to sand down than Green Stuff. Liquid Green Stuff on the other hand is still quite good for this type of work.


The lower pair of engines I built as a separate assembly and I made sure that it was almost completely finished before I glued it into place. That meant doing the panel lines as well and let me tell you, using a scribing tool on a round surface is no easy task.


The bridge was detailed and glued into place. However here I deviated from the source a bit. I discovered a bit (too) late that some of the details on top should be recessed. This can be very hard to get right if not built from the ground up with the recesses in mind. The easy solution is just to add protruding details instead. Another deviation was the top pair of engines. They should be cone shaped but as that can be *bleeping* hard to get right with plasticard, I came up with another solution instead.

Another recessed detail was located on the top of the front. This however I was prepared for. I just made some cuts in the ship, gently pressed down the piece and glued 1mm square plasticard around it to hide the cut. After that it was just a matter of trimming down the excess plasticard and filing it flat.


The back of the wings was a bit of a problem. In this case I had good pictures but they were fairly non-descriptive. Just a mess of shapes with no real meaning. I tried something of my own instead. Star Wars ships often have exposed mechanics and wiring so I thought what the heck, let's try it out. The end result came out better than I expected but it is fiddly work. Most of the those 'wires' are just 0.5mm thick.


At this stage, just about every major part was finished and glued into place and only details were left. The prongs did receive a bit of a special treatment however. Since I didn't want them to flex I decided to line the inside with a 1mm thick and 2mm wide strip of plasticard. The total thickness of a prong therefore went up to 2.5mm and they are quite stiff. Should be more than enough to survive the rigours of tabletop combat.

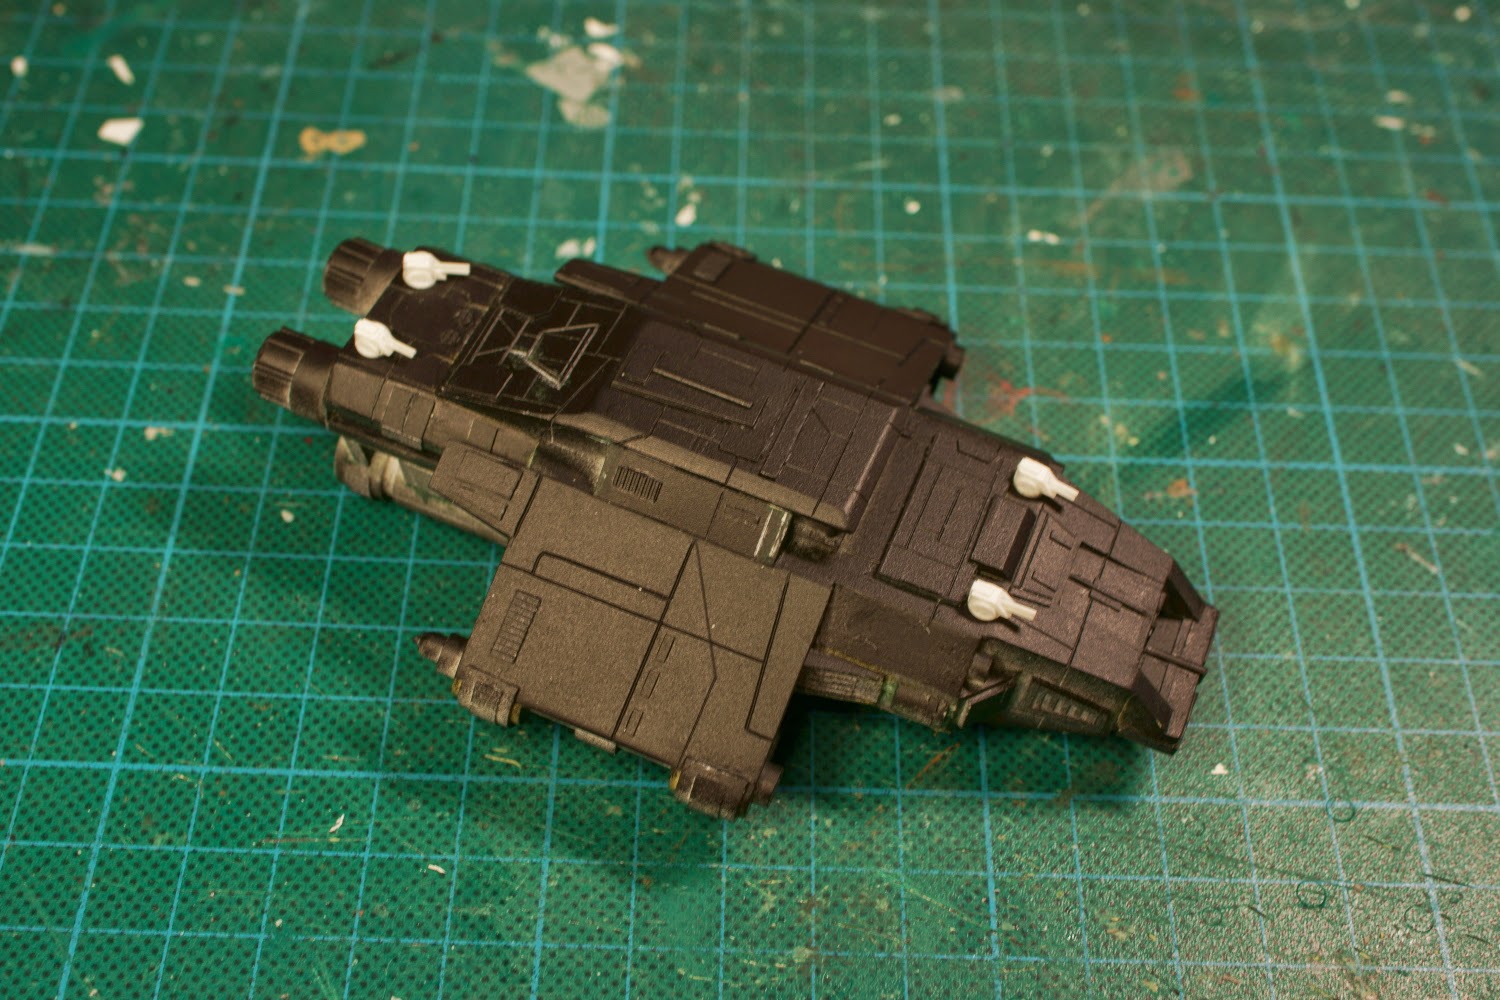

The usual layer of black spray to spot flaws and forgotten scratches followed but then I remembered that I had forgotten the guns! After quickly building four small turrets (the strip of plasticard in the picture together with the turrets is just 1mm wide) I could finally consider myself finished with the Vigo. Of course, now the painting would begin.
Inspiring work!
ReplyDelete