
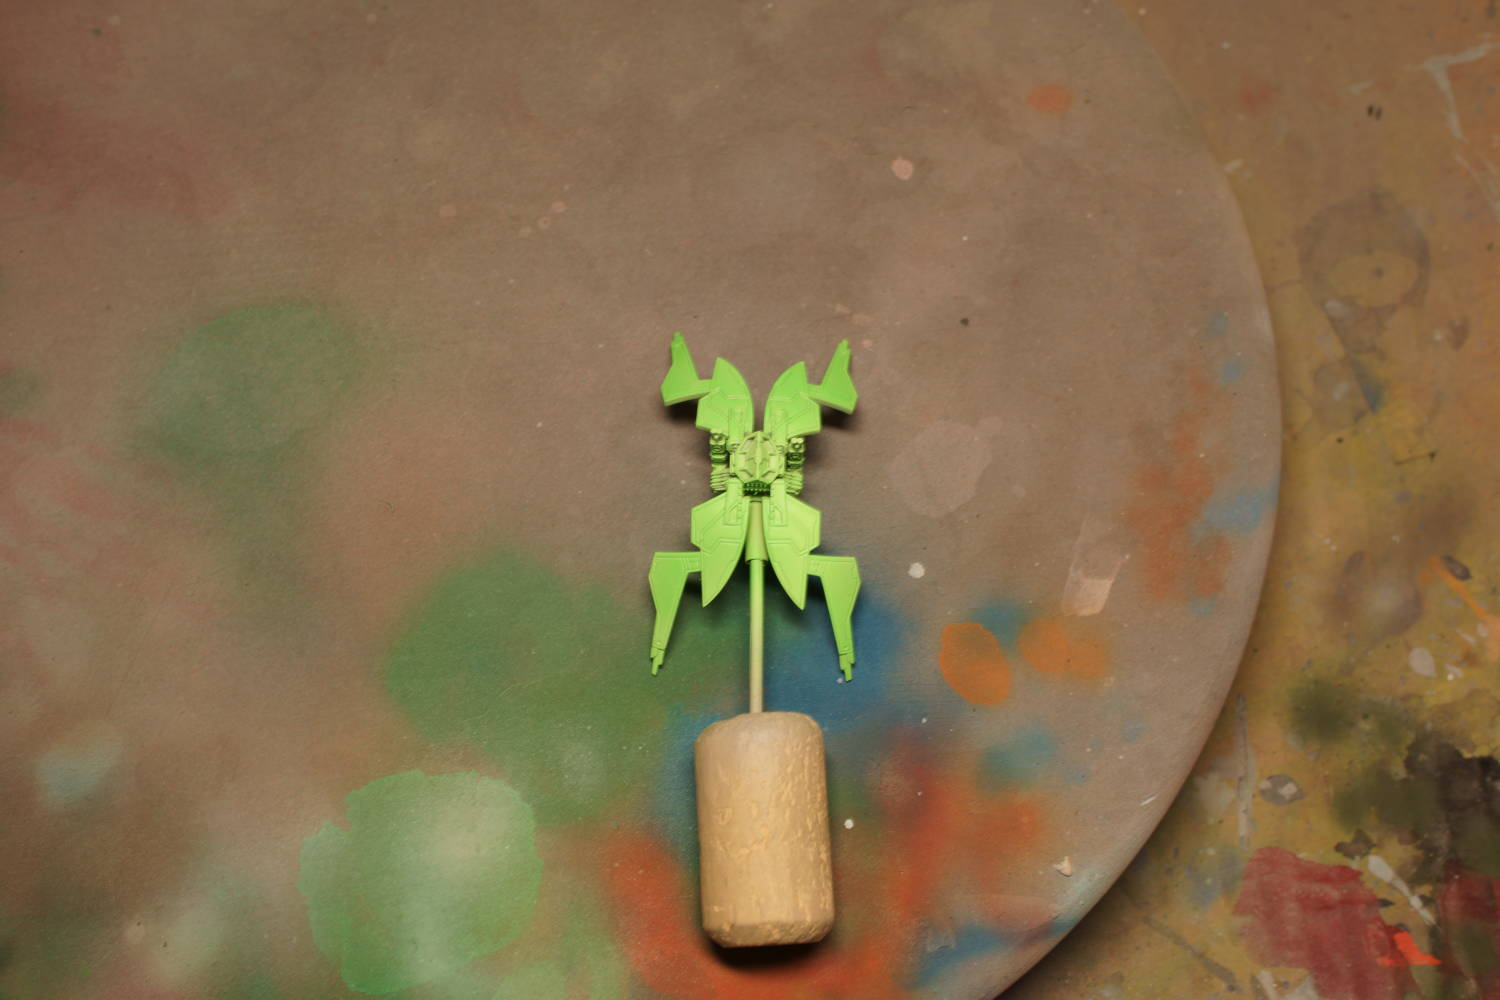

The black and green Starviper would need quite a bit of airbrushing to complete so I started with a layer of white primer. This gave the following colours a good foundation, something that was very much needed, considering all the fluo colours I was about to use.
For the basecoat I used VGC Fluo Green. This was followed by a 4:1:1 mix of VMC Fluo Yellow, VGC Plague Brown and White for the yellow areas, and a 2:1 mix using VMC Fluo Blue and White was used on the blue areas. For the red spots in the middle of the yellow I used VMC Fluo Orange.

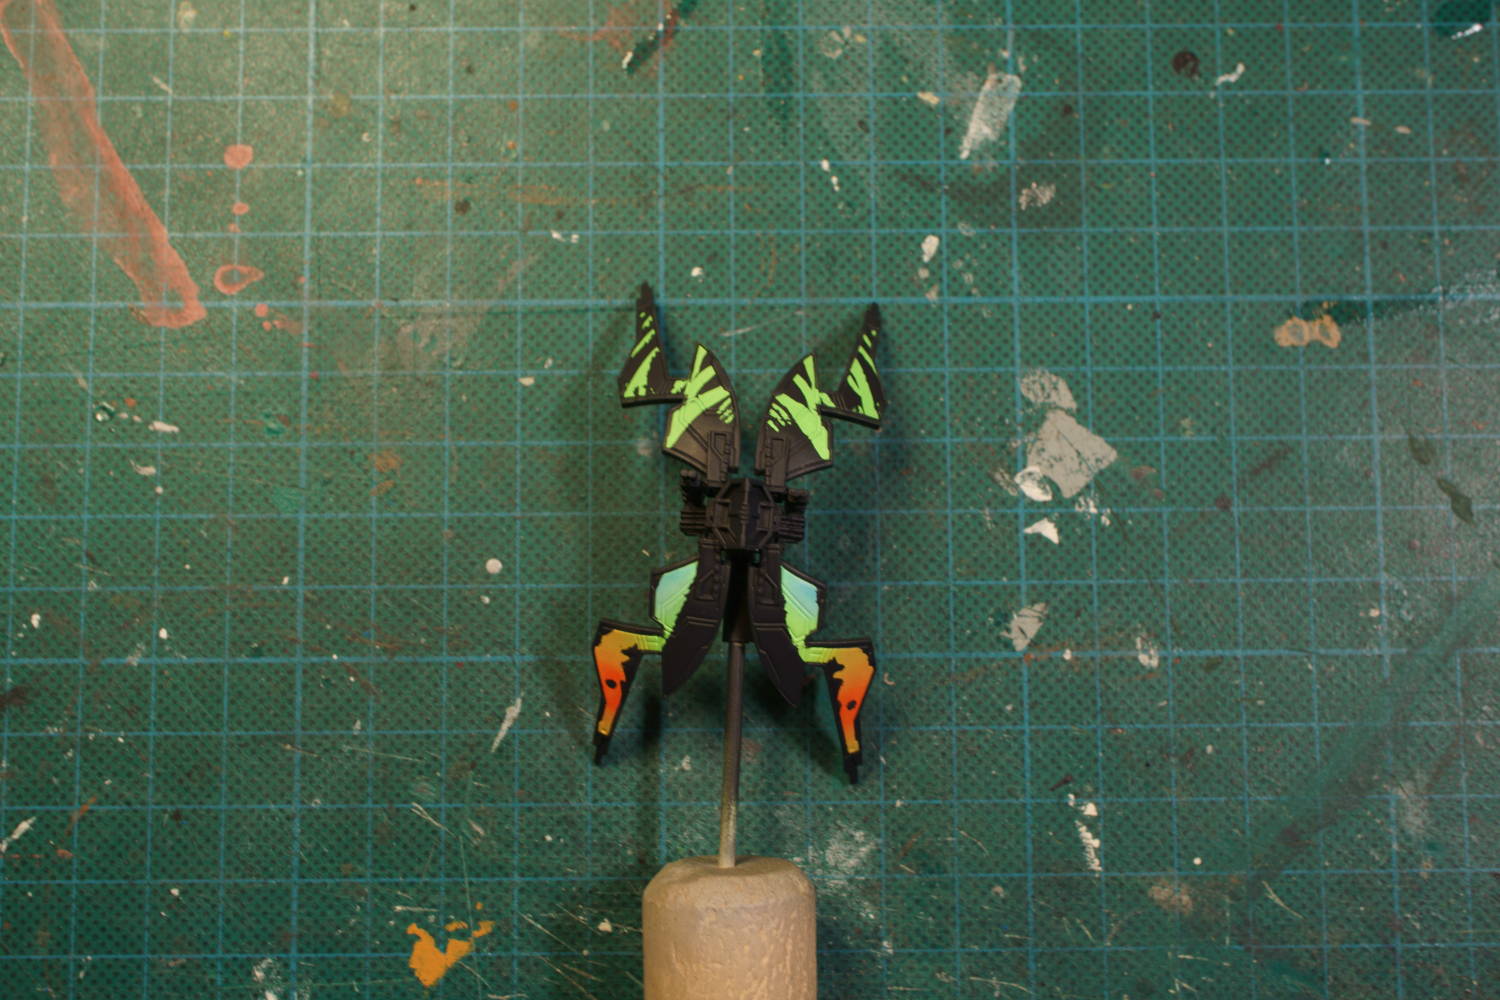
To get the stripes and preserve the brightly coloured lower wings, I carefully applied some liquid mask, taking great care not to make the pattern too neat. When the mask had dried I airbrushed the entire model using a 1:1 mix of VMC German Grey and Black. After that it was a simple matter of removing the mask by gently rubbing my fingers over it.
After the mask removal I brought out the black mix again and retouched and cleaned up some areas, particularly the edges of the wings. I also added a black spot in the middle of the areas previously painted with Fluo Orange.


After an oil wash using black oil paint, I could begin highlighting the model. I first highlighted the brightly coloured parts of the wings, mainly using the same mixes as previously, only adding additional White as needed.
For the black I started with a 2:1 mix of German Grey and VGC Cold Grey. The second layer was pure Cold Grey and for the third and final highlight I used Stonewall Grey with a tiny amount of Cold Grey mixed in.
As you can see above I also took the time to paint the windows, however the commissioner wasn't pleased with my choice of colours so I had to repaint them later.


The engines were painted using a 1:2 mix of German Grey VGC Sombre Grey. This was shaded using AP Dark Tone ink and later highlighted using the same mixes as for the black hull and wings.
The engine glow was slowly built up using successive glazes of AP Red Tone ink as a start. When I had a good start I switched to VGC Red Gore that I added small amounts of white to until I had almost reached pure white.
For the second try on the cockpit windows I used a 1:1 mix of Cold Grey and Sombre Grey. These were highlighted by adding ever greater amounts of VGC Stonewall Grey to the mix. For the final parts of the window reflection I used pure white
Hey I have a question about liquid mask. I use the vallejo one but i have the hardest time removing it from my brushes. Got any advice? Im getting tired of having to throw away brushes
ReplyDeleteI did some research on this very subject when I started using Vallejo's liquid mask and found someone who claimed that some types of rubber 'dislike petroleum products'. I don't remember what substance he used but I took his advice to heart.
DeleteAfter some experimentation I've found that white spirits works quite well in removing liquid mask. Dip the brush in the liquid and gently rub the bristles and soon enough you should have dissolved/removed most of the mask. Mind you, white spirits is quite harsh on brushes in it's own way, especially brushes with natural fibers so keep one brush specifically for liquid mask use.