
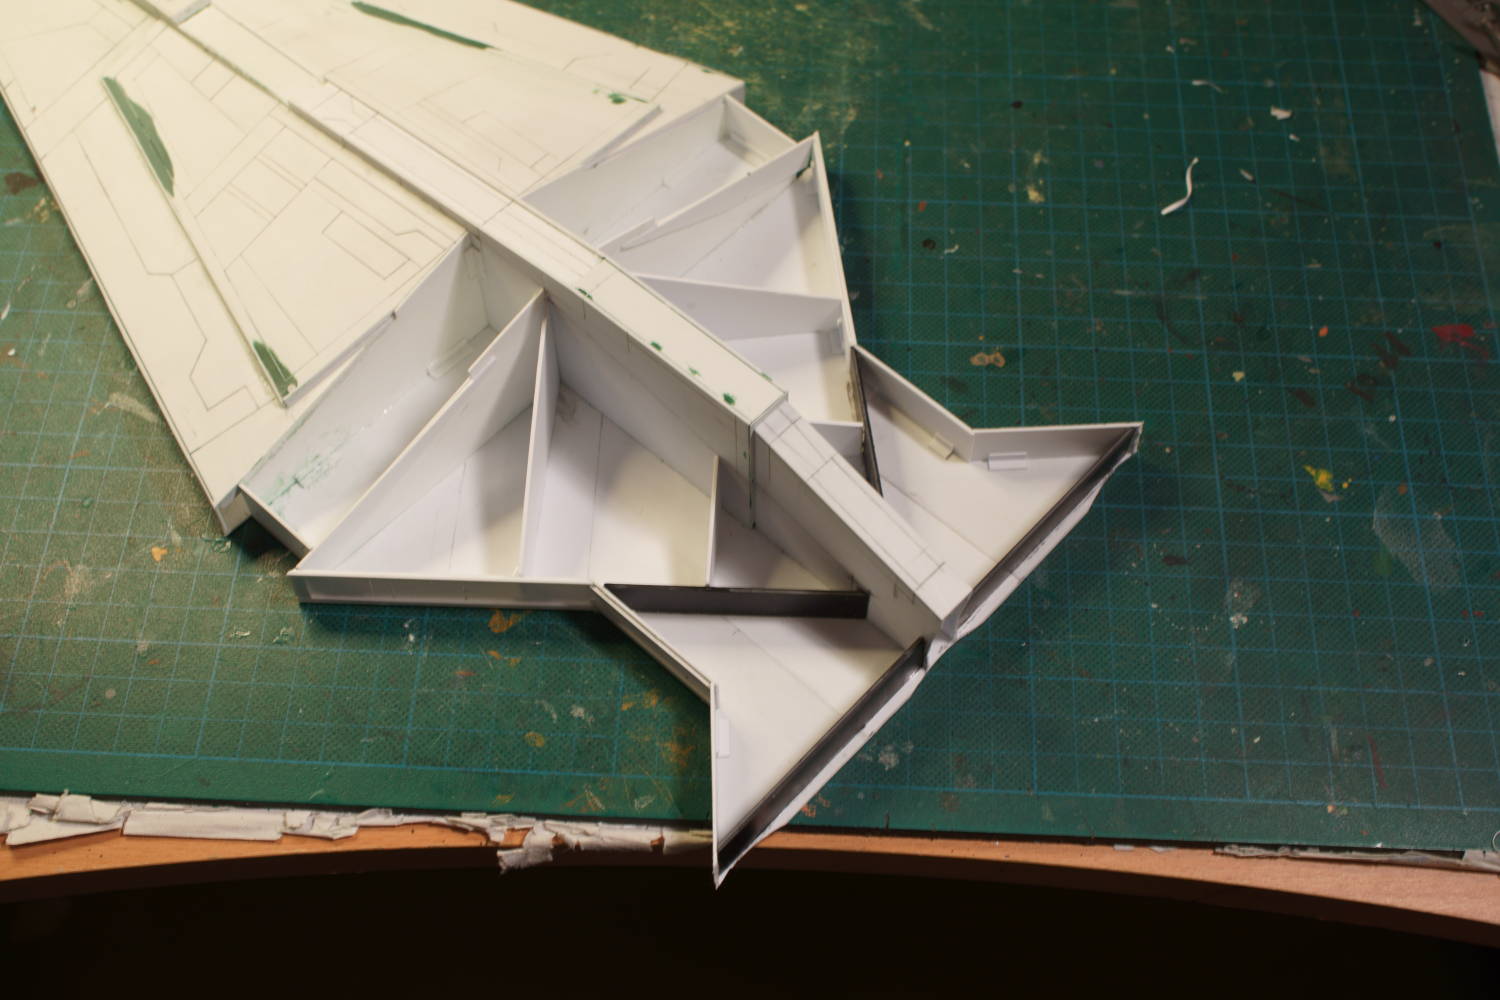


Having previously learned my lesson, for the rear superstructure I built the outer hull as several layers upon each other. A good deal easier to build and sturdier to boot.


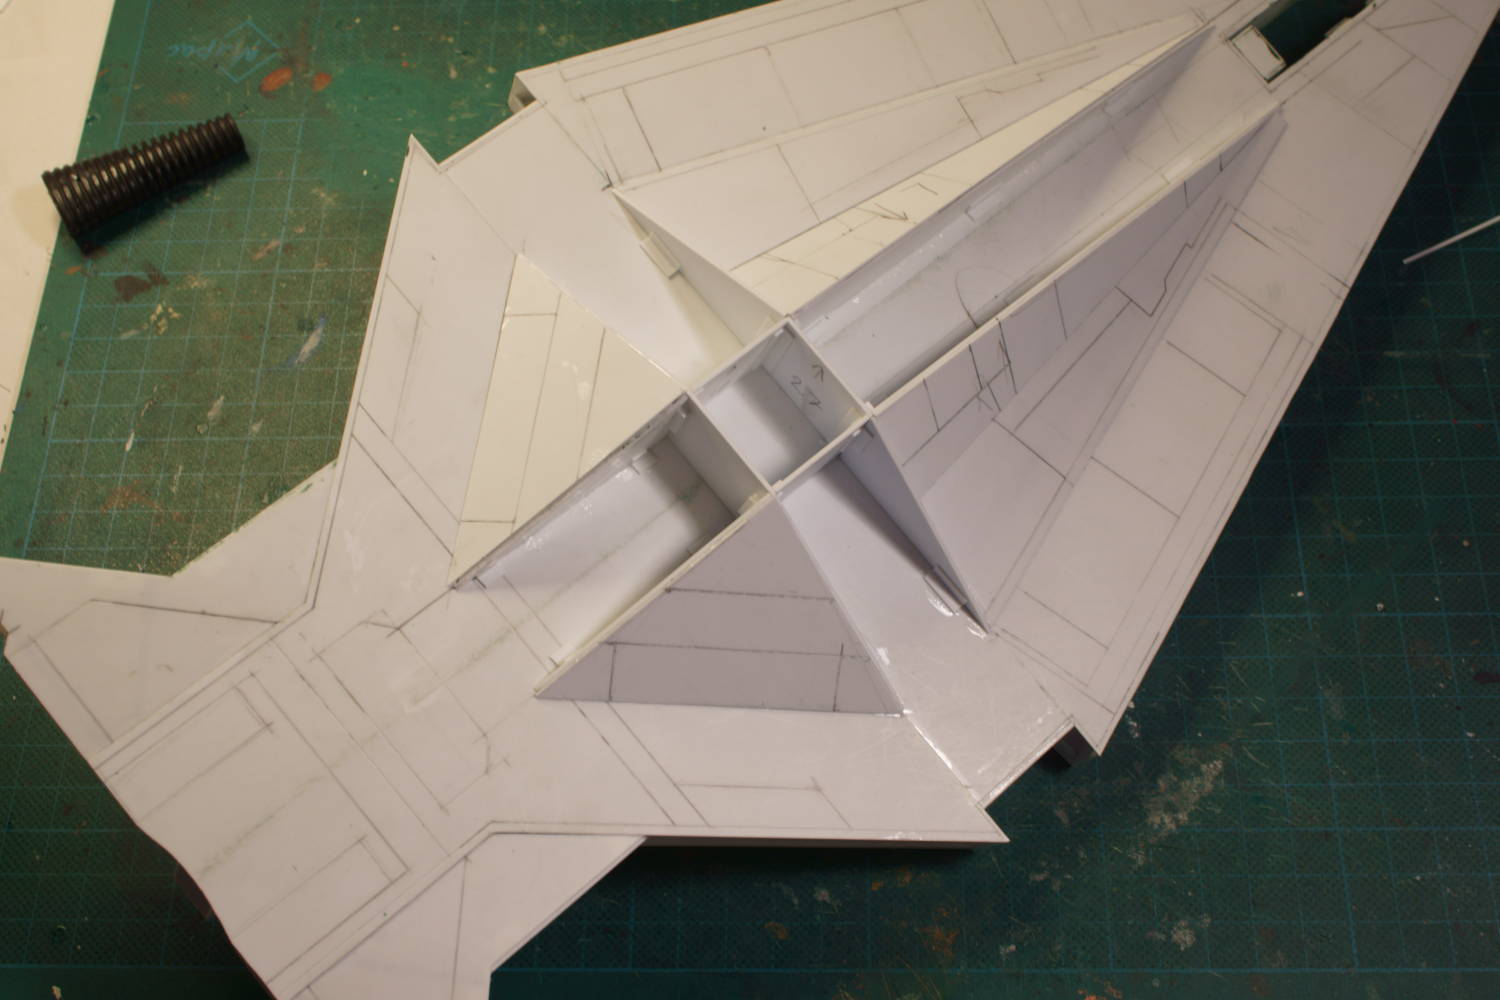

I had deliberately waited to add any sort of structure to the bottom of the ship until I was finished with the top. Basically, it was so practical to have a flat surface to work from that I tried to keep it as such as long as possible. Alas, to finish the ship I had to 'ruin' the flat belly of the ship.


With the major structures in place I could begin on the smaller structures. I'm not sure exactly what all of these are supposed to represent but it's not my business to question the design, just to build what I can see.


The bridge I had to give some special consideration. I didn't have much info about its dimensions so I was really only guessing when I built it and yet somehow I managed to build a mighty fine piece of plasticard that really fits the rest of the ship.
The windows are really supposed to be recessed but at this size (the smallest windows are about 1.5-2mm across) that's rather difficult to do. Instead I brought out my thinnest plasticard (0.13mm thick) and made them raised instead. Much easier and yet doesn't look out of place at all.


The only visible weaponry the ship possess are four turbo laser turrets. The toughest part building these were aligning the barrels properly and making sure the magnets connected as intended without much possibility of any parts scraping or rubbing against each other.


No proper Star Wars ship is without greebles and this ship was no exception to that rule. The pictures above do not capture all the greebling I did but it certainly gives an idea. To help break up the symmetrical look of the ship I ensured that a good number of greebles were in fact placed asymmetrically.
Before that however, I sprayed the ship with some black paint. This is something I do to make it easier to spot any flaws. I suppose it's a bit counter-intuitive but black creates far better shadows than white and this makes a huge difference when hunting for imperfections.
That is insanely cool! You should cast it in resin and sell copies! Very clean, detailed work.
ReplyDeleteIncredible. Wish I could scratch build like that.
ReplyDeleteNot sure if this is active at all but are their plans or templates available? As I'd like to take a crack at one of these.
ReplyDelete