Just as promised yesterday, here are the proper pictures of the finished models.
Cheerio!
Showing posts with label Zinge Industries. Show all posts
Saturday, 10 May 2014
Friday, 9 May 2014
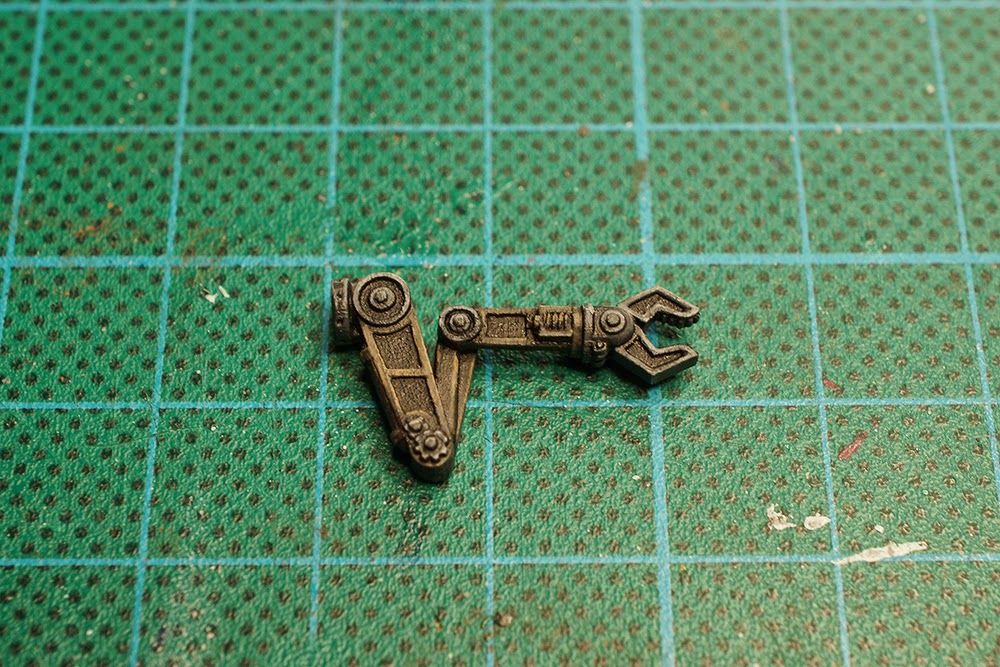
Painting a servo arm
Sorry for the delay but real life has a tendency to get in the way of the fun stuff. Anyway, here is the paint guide I promised in my last post.
After painting the arm with Vallejo's black primer, I painted the claw, the claw adaptor, the anchor point and the rings and cogs at the ends of each arm with Vallejo Model Color German grey. The arms themselves got a coat of a 1:1 mix of Vallejo German grey and Vallejo Model Color Chocolate brown. Next I washed everything with Army Painter's Warpaint Dark tone ink . Funny thing about the ink though is that it is NOT an ink. Instead it is extremely similar to Games Workshop's old Badab Black wash.
After the wash I repainted most of the model with the original colours, leaving only the deepest recesses. After that I applied the first of the highlights on the arms, leaving the areas painted only with german grey for later. The first highlight consisted of a 1:1:1:1 mix of German grey, Chocolate brown, Vallejo Game Color Earth and Vallejo Game Color Cold grey.
Next I applied a 1:1 mix of Cold grey and Earth to almost all the edges of the arms. I then added some Vallejo Game Color Stonewall grey to the previous mix which formed the final highlight on the arms. After this I started the first highlight on the areas painted German grey with a 2:1 mix of German Grey and Cold Grey.
The second highlight was the same colours, just reversed ratio. The third was just plain Cold grey. The fourth and final highlight was Stonewall grey and it was almost nothing more than dots on the highest points of the claw and anchor point.
The last thing that I painted was a minor detail on the back of the first stage arm. I started with some red, in this case GW's Evil Sunz Scarlett but any bright red would do, and washed it with Army Painter's Strong tone ink. After applying the base colour I added some Vallejo Game Color Hot orange as a simple highlight. And that's all folks! Tomorrow I will post pictures of the finished model but for now this will have to do.
Monday, 28 April 2014
Even more servo arms!
Followers of this blog might remember that I bought some stuff from Zinge Industries a couple of months ago and that I quite liked them. Go check out those posts if you don't know what I'm talking about:
Now why would I be mentioning this? Well, I recently got a nice little surprise sent to me from Zinge. An entire new set of servo arms! The only complaint I had with the previous set, and it's hard to call it a true complaint, was that they were quite big. However, Zinge Industries seems to have heard my plea and sent me a smaller set for testing.
As with the previous servo arms, this is very well made with nice and sharp details. The resin is free from both bubbles and mould lines. I dare say that Zinge Industries' resin is perhaps the best I've worked with! Some of the parts are somewhat rough on the surface but since this a first run pre-release, it should be cleaned up before the finished product is put into full production.
The parts included are:
Just like its bigger cousins, the design of the arms is almost ingenious, just look at how I have folded them together. That's without any modification on my part. The potential in posing the arm and converting them to be used with other models is staggering.
Personally I just wanted a basic servo arm so I quickly botched together some things and ended up with my very own flying servitor. The arm is magnetized for easy removal.
Compared to its previous incarnation, the new servo arm is quite frankly tiny. Heck, even my own slimmed down version is almost huge when placed beside the new one. All in all, I am very pleased with the smaller servo arm set. It is well made, well designed, has several build and posing options, and can be used for a multitude of projects.
Join me next time to see how I painted it.
Now why would I be mentioning this? Well, I recently got a nice little surprise sent to me from Zinge. An entire new set of servo arms! The only complaint I had with the previous set, and it's hard to call it a true complaint, was that they were quite big. However, Zinge Industries seems to have heard my plea and sent me a smaller set for testing.
As with the previous servo arms, this is very well made with nice and sharp details. The resin is free from both bubbles and mould lines. I dare say that Zinge Industries' resin is perhaps the best I've worked with! Some of the parts are somewhat rough on the surface but since this a first run pre-release, it should be cleaned up before the finished product is put into full production.
The parts included are:
- 1 first stage arm
- 2 middle stage arms
- 1 end stage arm
- 1 end stage adaptor
- 1 claw
- 1 flamer/welder
- 1 optical/inspection tool (I'm slightly guessing here)
- 3 anchor points in different sizes.
Just like its bigger cousins, the design of the arms is almost ingenious, just look at how I have folded them together. That's without any modification on my part. The potential in posing the arm and converting them to be used with other models is staggering.
Personally I just wanted a basic servo arm so I quickly botched together some things and ended up with my very own flying servitor. The arm is magnetized for easy removal.
Compared to its previous incarnation, the new servo arm is quite frankly tiny. Heck, even my own slimmed down version is almost huge when placed beside the new one. All in all, I am very pleased with the smaller servo arm set. It is well made, well designed, has several build and posing options, and can be used for a multitude of projects.
Join me next time to see how I painted it.
Saturday, 8 February 2014
Servitor
Just a quick update to show off the first finished Servitor. The techmarine is finished as well, but I just couldn't get a decent photo of it so this will have to do.
Etiketter:
40k,
Enforcers,
Mantic,
Space Marines,
Zinge Industries
Tuesday, 4 February 2014
More Industrial claws
I've continued to work with the items I bought from Zinge Industries but the size of the things was a problem. As mentioned in the previous post, the robotic servo arms was quite a bit bigger than I had expected, and I faced the same problem with the track units. This was further complicated by the fact that the Deadzone sentry guns was smaller than I had envisioned. Mounting two tracks side by side with the gun platform on top would just look ridiculous, not to mention that a standard 25mm base wouldn't really be big enough.
Instead I cut one of the track units in half and manufactured a simple plastikard box in between them. Ah, what would I do without plastikard? After gluing the tracks to the box it was really a simple matter of smoothing out any flaws with liquid green stuff or similar substances and adding some details to the front and back of the 'box'.
In the picture above you can see the final assembly though at the time the picture was taken, I hadn't actually glued the top parts in place. I usually find it much easier to paint models if they are in manageable sub-assemblies.
Etiketter:
40k,
Enforcers,
Mantic,
plasticard,
scratch build,
Space Marines,
Zinge Industries
Friday, 31 January 2014
Industrial claws and tools from Zinge Industries
I recently bought a number of items from Zinge Industries that I intended to use together with Mantics Enforcers, more specifically the Enforcer Engineer used in the Deadzone boardgame. My plan from the very beginning was to turn that model and his sentry guns into a Space Marine techmarine and Servitors.
I must admit to being quite pleased with my purchase. All parts are cast in a light grey resin that is quite soft and easy to work with. The details are sharp, and apart from a fair amount of flash, doesn't need much cleaning. The only bubbles I could find in the resin was those that showed up from carving or cutting it so normally you wouldn't see them. If I wasn't so hell bent on converting everything I touch, I wouldn't have found them at all! Strangely though, some of the parts in the third picture looked like the mould had been misaligned slightly. Nothing that a proper knife and some carving couldn't fix so it is not much of a big deal.
| Small track unit |
| Robotic Servo Arm - Arms only |
| Robotic Servo Arm - 1 Arm with Various Heads |
| Mechanical Fists |
I must admit to being quite pleased with my purchase. All parts are cast in a light grey resin that is quite soft and easy to work with. The details are sharp, and apart from a fair amount of flash, doesn't need much cleaning. The only bubbles I could find in the resin was those that showed up from carving or cutting it so normally you wouldn't see them. If I wasn't so hell bent on converting everything I touch, I wouldn't have found them at all! Strangely though, some of the parts in the third picture looked like the mould had been misaligned slightly. Nothing that a proper knife and some carving couldn't fix so it is not much of a big deal.
The robotic arms are a treat to work with. By simply cutting away or adding links to the power cable on the back of it you can change the pose drastically and all the connectors and tools makes it very easy to add variety to them.
I had however miscalculated the size of the robotic arms which meant that they would be too damned big for my Enforcer Engineer / Techmarine. Instead I chose to manufacture my own, slimmer version by using some of the add-on parts from the robotic arms and some plastikard.
Etiketter:
40k,
Enforcers,
Mantic,
scratch build,
Space Marines,
Zinge Industries
Subscribe to:
Posts (Atom)