Showing posts with label Ironside. Show all posts

Friday, 27 December 2013

More (and better) pics of the Iron Raider

Took the time to take some proper pictures, which despite my rather crappy equipment came out fairly well.


Thursday, 26 December 2013

Building an Ironside Land Raider part 4

The beginning of the end of this build. I must admit that is was a real treat seeing the entire thing coming together as I had planned it.


I had to carve big holes in the sides of the hull to make the laser turrets fit. Around these holes I fitted some additional plastikard and I also finished the side hatch design.


Finally I added some detailing on the sloped middle part of the tank and to the side of the machine gun turret mounting plate. Also, rivets. Lots and lots of rivets. I could damn them all to Hades! Small and fiddly and doesn't always stick when and where you want them to. To even be able to handle them I had to cut them about twice as long as they were supposed to be, use some fine tweezers to pick them up, dip them in glue and put them in place. After that I had to wait a day for the glue to dry/harden properly, cut them in half with a fine sprue cutter and finally file them down to the proper size. A man could go crazy for less. And all this assume that the damned things didn't drop off later! As a sidenote, in the second picture above you can see the final power plant assembly.


The weapons were really the final pieces of the puzzle. They are all magnetized for easy changing and transporting. There are, after all, two more Land Raider versions I could build. The machine gun turret went on more or less without modification. The lascannons however did get some changes. I turned the barrels so they lined up properly with the rest of the vehicle, removed most of the top details and manufactured a gun shield for each to cover the area with no details. The shields are not featured here as I forgot to take a good picture of them. In any case, the vehicle now only really needed some paint. I might later show how I painted it and I will definitely take better pictures of it but for now I leave you with this to show the finished model.


Building an Ironside Land Raider part 3

And so the detailing began. Everything I did from this point forward was made in an effort to mimic an original, unmodified Ironside. Not strange considering I already had three others fully painted and I wanted this one to fit in without being bullied by its brothers and sisters.


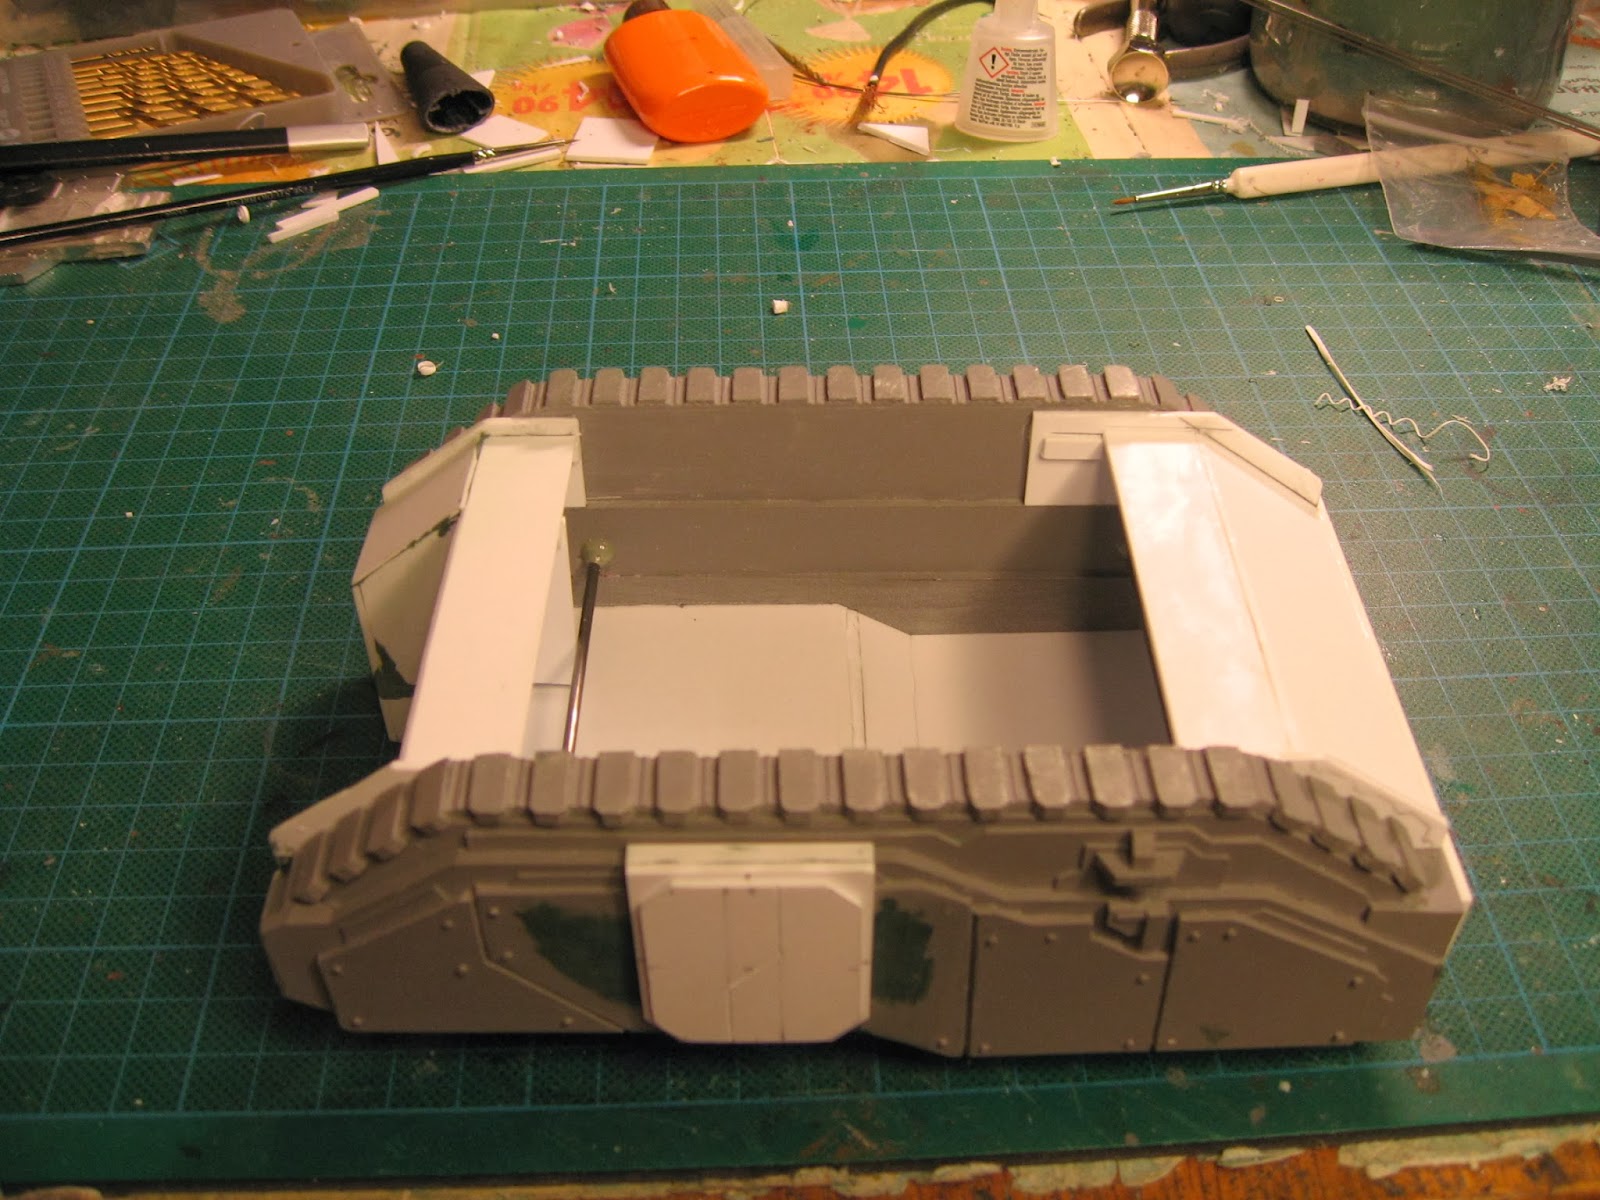
First I fitted a leftover part from a previous Ironside on the rear superstructure. It is the only metal part on this tank and the reason I hadn't used it was because it was crooked from casting and I didn't quite like the way it looked. However, on this build it worked fine, especially after I fixed most of it's crookedness with Violence (tm)! Also called bending while grunting really loudly since the damned piece is quite thick. After some filing to make it flat on the underside, I glued it on place on top of another piece of plastikard for final placement. After that I filled the rest of the rear superstructure with assorted plastikard bits and started fleshing out the top of the crew compartment as well.


Sometimes when I build bigger things I spray some black paint on it while building. This gives the model better shadows and makes it a bit easier to see any imperfections, places that need more sanding and holes that needs filling. Another benefit is that it makes later additions easier to identify in a build guide like this. As you can see I added some more details on the crew compartment, made another, better hatch on the metal part and added some support pieces to the box around the rear superstructure.


I finished most of the rear next. First I constructed a simple hatch and then turned my attention to the power plant. At first I was tempted to use some parts from Blood & Skull Industry, but decided that that I was going to make the engine myself. I did however draw inspiration from Blood & Skulls tank engine so I will give them credit for it. The power plant is made up of two parts. The first is basically just a rectangular box with two tubes cut in half on top. The next is the engine cover and as you can see it has six openings in it to show the inside a bit. In a later picture you can see the final assembly. Oh, and the dark grey fan/vent on the right of the cover? That is a leftover piece from the underside of a foot of a Gundam robot. Never, ever throw away your bits, kids!


The front hatch was a bit of a conundrum. I knew earlier that I had made it too long but that was not a bad thing as I had not really decided on its design just yet. I spent some time looking at various sci-fi vehicles and real landing craft but in the end I decided to make it quite simple and yet fairly similar to an actual Land Raider. Looks chunky and rugged enough to take the running feet of a dozen half-ton super soldiers, doesn't it?


At this stage, the weapons had started to arrive. Even at the planning stage, I saw no real need to build the weapons myself as there are several companies that make good alternatives. For this build, I choose a pair of Laser Turrets and a Machine Gun Turret from Puppets War. One of the mounting plates (Which fits perfectly on a razorback BTW) I immediately cleaned up, put some plastikard around it and glued it in place. It is always fun when new toys arrive.

Wednesday, 25 December 2013

Building an Ironside Land Raider part 2

To begin I wish to apologize for several of the pictures as they are not always the best. Either I'm a crappy photographer or my camera isn't good enough. I tend to think it is the later reason since I have had several problems with it. In any case it was now time to add some plastikard!


The first three pieces was really only intended to create extra stability and structure to add everything else to. The middle part was not originally supposed to be that long but I realized that I could easily add more pieces to it. So instead of cutting it flush against the rear piece, I added to the rear superstructure and created a boxlike construct on top of it.


Next I added the base of the crew compartment, basically an off-centre box, where I imagined the driver and commander would sit. I also added the backplate and put lots of liquid green stuff on any imperfections. This would later be sanded down.


After this I fleshed out the crew compartment while I pondered about the front hatch. While I didn't bother with an interior on this build I did know I wanted a functioning hatch and it had to be bigger than an actual Land Raider hatch. What I came up with was quite frankly dead simple and yet works quite well.


I pre-manufactured the sides and glued them in place on what would become the front underside of the tank (As you will see later I didn't bother with covering the entire underside of the vehicle). After that I drilled some 0,5mm holes in the sides and hatch, put everything into place and pressed some 0,5mm pianowire into those holes to hold the hatch in place. Then I just slotted the finished construction into place.


The rear underside and side hatches were added at this stage and this completed the big structural part of the build. I was feeling pretty good by now so I took some pictures from all angles to celebrate, yet I knew the next part would take more time. Details!


Building an Ironside Land Raider part 1

As mentioned in the previous post, part of the reason for this blog was to show the good people at Pig Iron Production how I heavily modified one of their ubiquitous Ironside vehicles. If you wish to know more about this vehicle, head over to Graven Games for a proper review.


As of right now I own five of these great vehicles and I use them mostly as Rhino equivalents in my homebrew Space Marine army. Yes, every Space Marine vehicle using the Rhino chassis are represented using this as a base. However I wanted a Land Raider for my army and this was just not big enough. It is almost the same length as a Land Raider but not high nor wide enough. Recent experiments with plastikard however convinced me that I should be able to build my own Land Raider.

After some brainstorming and sketches I realized that while I could most likely build a Land Raider from scratch, I would be half insane before I had finished it. So to speed up the process I decided to use the Ironside again but widen it, make it higher and give it the proper weapons. After some consultation with Pig Iron I got myself a razor saw and started cutting.


As you can see I cut away the middle and left the sides. While brainstorming I knew that the tracks would be the most tedious part to build on my own so this was a huge time saver in the long run.


Next I remove a good deal of detail on the top of each piece and the hatches on the sides. This was in preparation for the plastikard superstructure that I was going to add.


Finally I added two rods made out of 2mm pianowire in between the pieces to give the tank stability and finalize its basic size. I glued these in place with epoxy glue. Ironically I intended to make the model 11cm wide but apparently I miscalculated somewhere, because the final width on the finished hull was 10,5cm. Oh well, still half a centimeter wider than an actual Land Raider.